From a business perspective, Open Source is appealing due to the software being available for free. Obviously this comes with the caveat, free as in puppies; not free as in beer. While open source software can be copied and used with minal (if any) cost, configuring and maintaining will be an in-house task. Despite this internalised cost, there are other elements that make open source software appealing: multiple contributors leads to faster development of required/requested features; higher security and therefore a much larger return on investment. Although it is debateable whether open source software provides higher security, it has been a driving factor for many companies now selling support rather than software liscences. (Red Hat, Canonical…) On the personal side, there is also an element of involvement. When there is a tool you use regularly, it becomes quickly apparent which features are missing. It is possible to request these, but the developpers usually maintain these tools in their spare time meaning it’s difficult to implement all features while maintaining secure code.
So why not just make your own copy with the required feature? 4 simple steps:
Fork the code (make an online copy that is yours)
Clone that code onto your system
Implement the thing (and test the thing)
Tell the developper you implemented the thing
Automation
While most programming languages will provide you with libraries to fulfil any peculiar needs you may have, there already exists a ready built solution which is more robust than the 10 lines of code you may be throwing together in an attempt to solve a problem. I had wanted to automate son enumeration tools, namely Sherlock and WhatsMyName. I’d used these tools in the past, but they have too many common entries and false positives. The first step was to attempt automating sherlock so that a simplified command would execute it with all the necessary flags (output file etc. etc.).
Sherlock played nice, WhatsMyName however, did not. WhatsMyName only returned positive entries to the shell (or STDOUT) and would not accept alternate filepaths for its own database. It required some research for specific syntax of some packages, but within a rather short timeframe I had a version of the software that provided added functionality: writing to a file & using a different file from default for testing. I let the maintainer know (pull request) and to my surprise it was accepted within 3 hours.
Now that I had sherlock and WhatsMyName automated to output to a specific folder, the next step was analysing for unique entries. I was able to do this with a short perl script which takes advantage of hash tables to test for duplicates. With a known username the list went from 86 entries combines to 65 unique. Sadly, when testing the sites in a browser, many rendered a 404 page. Fortunately, open source meant I could quickly test these with existing solutions, in this case HTTP::Tiny. 65 Unique entries went down to 61. Back in 2012 when I was learning perl, I’d had to write web scrapers as part of the larning process. I could parse the sites looking for “user does not exist” or similar. Except, there is yet another far more robust solution.
EyeWitness will take a list of URLs and provide a screenshot of the page. This means if the profile exists I can quickly verify its authenticity, and if it does not exist can quickly eliminate it without needing to do any additional parsing. Full automation.
The crutch
Although Open Source empowers users to becomes creators and make the tools they use, it does have one major inconvenience: Liscencing. Each developper, or development team gets to pick how future users can use, alter or deploy their tool. In most cases it is a simple case of “Let the user know we created this and it’s cool” but other teams want to keep a tighter control of how their solutions are used. When you keep your versions isolated from the public in the most there are no problems, but when inviting others to expand capabilities it does become a different ball park.
To Open Source or no to Open Source
For the majority of use cases, Open Source will provide a solution which works out of the box. There can be configuration issues, but this comes with the reduced cost. For a solution making development accesible and inclusive to an increasingly large audience, the liscencing issue seems almost trivial. Time will tell. The only case I can still see for use of closed source software remains ERP specific solutions, where the code base is so large making it public exposes the codebase to more security risks than it covers.
As we move into 2021, it would be excellent to see better password hygiene for all users, technical or not. When people ask me why it’s important to avoid password reuse, I will refer them to services showing past exposure; namely Have I been pwnd. Finding that your accounts were exposed to breaches often leads to the realisation that the same password was used for insecure services as for more sensitive elements, such as banking or private email. I’ve seen their eyes suddenly shine with hope as they come up with an incredible strategy: “Uniquely complex passphrase to which the service gets appended”. From a password complexity point of view this seems relatively good; you have a long password meeting most service requirements to which you are adding additional complexity by appending the service name. You’ve increased your password / passphrases length making it hardee to guess. While this strategy means you are not reusing the exact same password accross the internet, it means you are trusting the companies to encrypt your credentials. Sadly, even tech giants fail to do this as shown here by Forbes.
After seeing how little tech giants care about your privacy and security, the next question that comes up is “Why can’t I use the password manager from my browser?”. The truth is a browser based password manager is better than no password manager. If users are using this, then that is better than nothing, and some browsers will go so far as to provide breached account warnings. Firefox provides this through it’s Monitor service. The primary disadvantage from the user’s perspective is accessing your passwords for services which are not run in your browser, such as company software not connected to SSO. There are many cloud / app password managers and these will allow you to segregate your accounts from your browsing history. Further, you can access your passwords from accross multiple devices, including mobile. Haveibeenpwned recommends 1password. Whether you decide to go for a cloud/app based password manager or a local storage such as KeePass will depend on your own use case and threat model.
2FA/MFA
You can store your Keepass databse on an USB drive, meaning that in order to access it you’d be needing the drive and the means of unlocking it. 2 Factor Authentication for your password manager. While this feature does not protect your other accounts, it does make KeePass highly portable across operating systems & devices. There are plugins for TOTP making KeePass a viable “1 stop shop”for certain users. It is worth noting that these plugins render the 2nd factor irrelevant, as it only takes access to the database to obtain both the password & TOTP. Some applications will allow linking to biometrics such as fingerprint readers / facial recognition. While the biometrics do make use and access easier, it is worth researching how and where the data is stored in order to avoid exposing your identity beyond what you may require. Choosing a solution for your authentication should include a balance of the usability & security the solution provides. However, this goes beyond the scope of “First Steps” with any password manager.
Why KeePass?
There are many password managers that provide the same service as KeePass while additionally providing backup & synchronisation accross devices. What does KeePass bring to the table?
For people with no previous use of password managers, KeePass is free. Free as in free puppies, not as in free beer. It will require some work to set up, but the default settings do provide decent security.
Additionally, if you are showing this to family members for whom you may need to provide support in the future, they can revoke your access to the database by changing the master password as opposed to learning a complicated management interfaces.
Finally, KeePass does not require yet another account. You can segregate all of your online accounts / aliases by storing separate databases with the single program. If you have some accounts which you want to access from mobile devices but others to stay offline, you can have 2 databases, and sync the mobile through cloud storage to your mobile devices.
First Steps
Hopefully, the above comments convinced you to give KeePass a try. It is a free solution so first thing is to get the KeePass client from their downloads page. Select the local installer or portable binaries depending on your use case. Version 2.X (2.46 at time of writing) is recommended unless you have specific reasons for using 1.X.
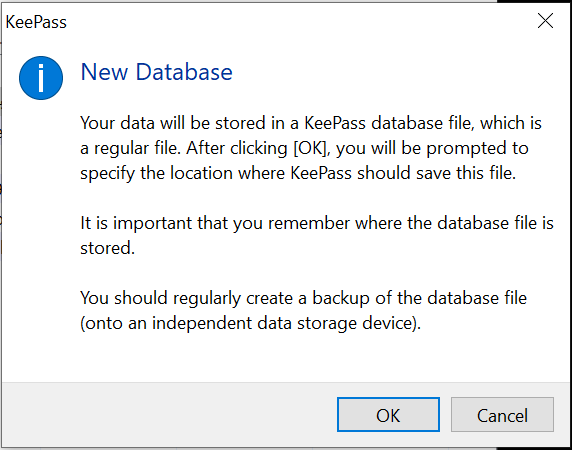
After installing or running the local binaries, create a new database. KeePass prompts you through the creation of the database:
KeePass New Database windows prompting where the database will be stored & recommending regular backups on separate storage media
Once you have selected a place to save the database, KeePass presents the authentication method. Master Password is checked by default, but the database can be linked to Windows accounts.
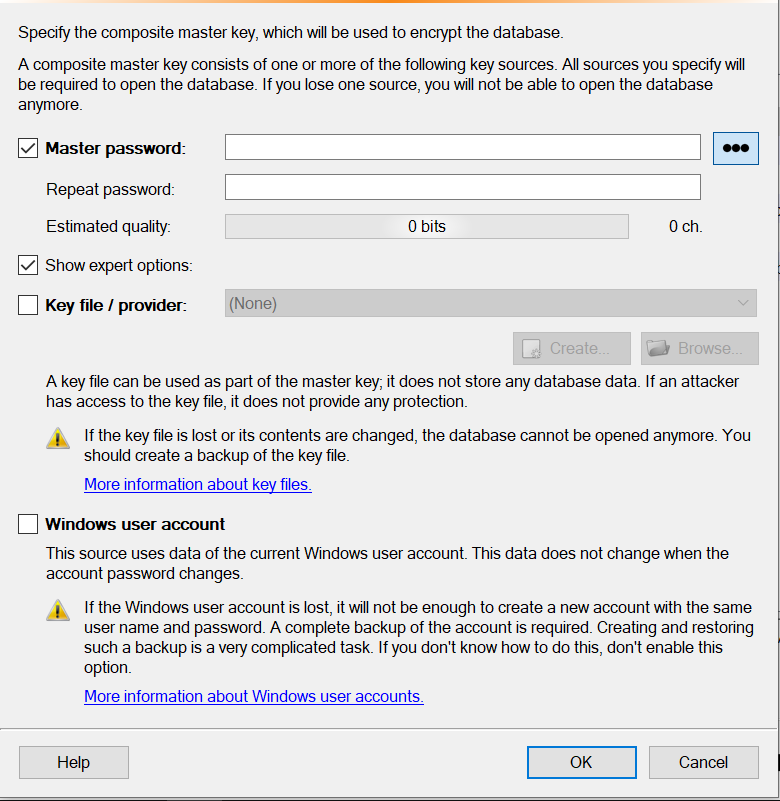
KeePass Create Master Key window with Expert Options showing. Expert Options shows Key file / provider with the warning that if the file is lost or contents changed, the database cannot be opened anymore. Expert options also show Windows user account, with the warning that if the user account is lost, it is not sufficient to create a new account with the same name and password.
From this window multiple elements can be selected, but at least 1 must be chosen to move forward. Connecting to the Windows user account can be a good solution for home users, only needing to access their device in order to access the rest of their passwords. I do not recommend this setting in enterprise environments – I have seen cases of bad GPO deployment where databases were lost due to changes to the account from external providers.
Selecting a master password should include using something memorable rather than a mix of random letters, numbers & special characters. [XKCD] There are random passphrase generators, namely Correct Horse Battery Staple, but ideally you would be using something unique to you and adding entropy through the substitution of some characters. The longer your passphrase the better, given additional characters increase the strength more than increasing complexity (use of special characters).
Once an authentication method is chosen, the creation process continues:
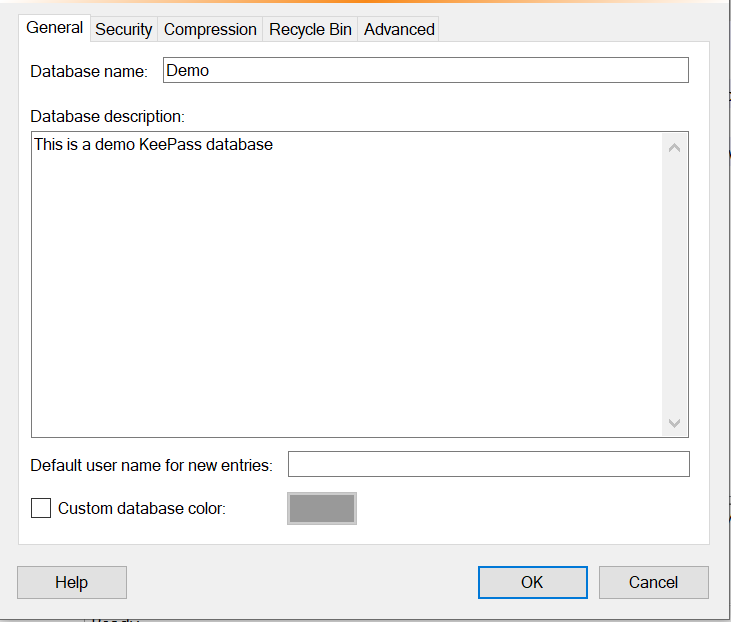
KeePass – Create New Database Step 3 window in the General Tab. Database Name shows “Demo” and Database description reads “This is a demo KeePass database”
Enter identifiable information for the name and description, particularly if running multiple databases. Then move onto the Security tab.
KeePass – Create New Database Step 3 window in the security tab. All settings are on the default
By pressing the ‘1 Second Delay’ button, the number of iterations is updated such that it will take 1 second for each attempt to open the database. This reduces the risk from brute force attacks, as each attempt requires 1 second, as opposed to an attacker being able to try multiple combinations per second. The compression tab allows to use GZip to compress the database, or use no compression.
KeePass – Create New Database Step 3 window in the compression tab. Default setting is GZip
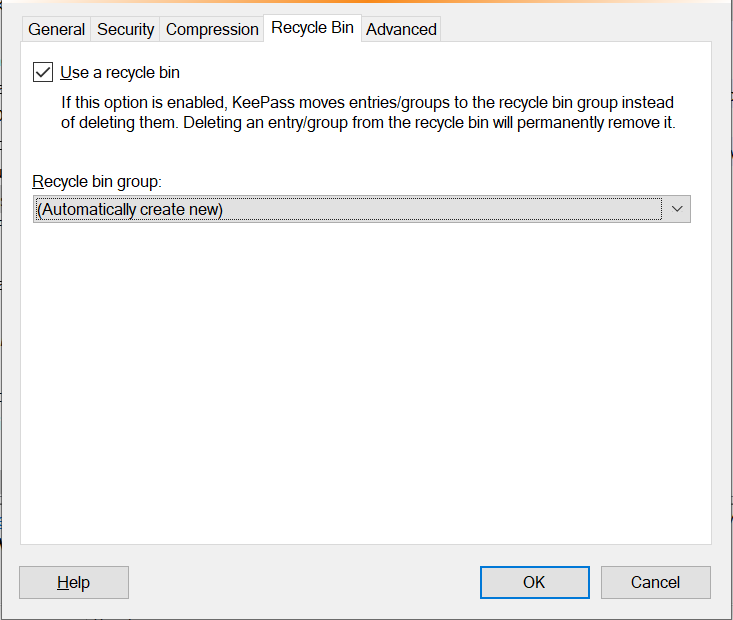
KeePass – Create New Database Step 3 window in the Recycle bin tab. Default setting is to use a Recycle bin & create a new group for deleted entries
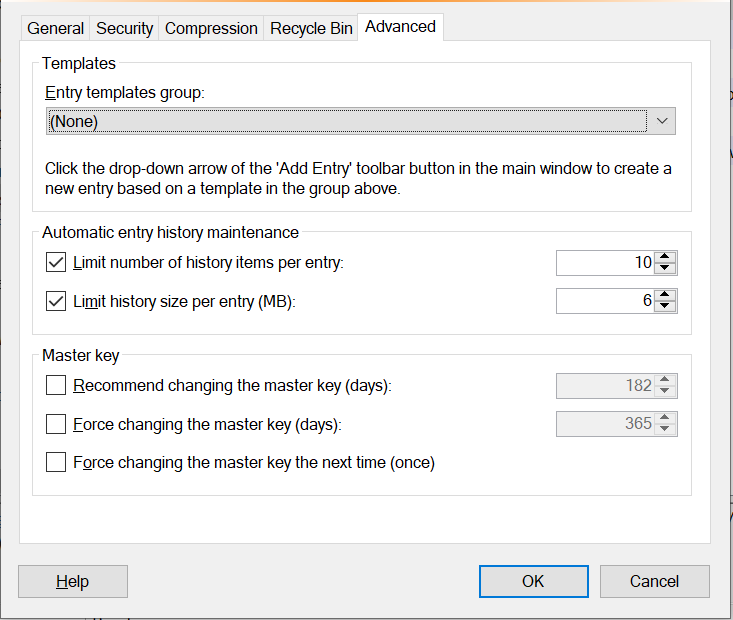
If you want to immediately delete entries uncheck the Use a Recycle bin option. Otherwise, leave as-is and control deleted entries as necessary. Finally, the advanced tab. Here the options to recommend & force changing the master key can be found. My recommendation is to check both the “Recommend changing the master key” and “Force changing the master key” and setting both to 180 days (approx 6 months)
KeePass – Create New Database Step 3 window in the Advanced tab. All settings are on their default selection, no elements checked for changes to the master key.
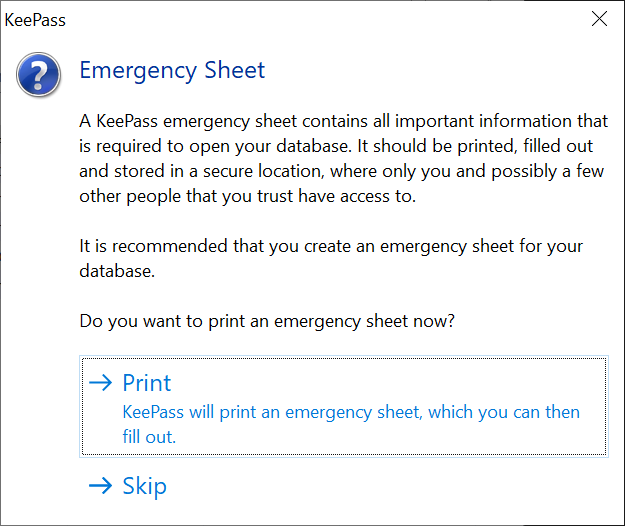
Once you are done with this, KeePass will suggest printing an emergency sheet. This is the only recourse for accessing your database if you forget / lose the master key. If the master key is changed / acces methods modified, this document will need to be generated again. It is important to store this document securely in a safe when printed. The sheet contains instructions to where backups are stored and what the master password is. Both entries are to be filled out by the user.
KeePass Emergency Sheet window explaining that the emergency sheet will contain all the important information required to open the database.
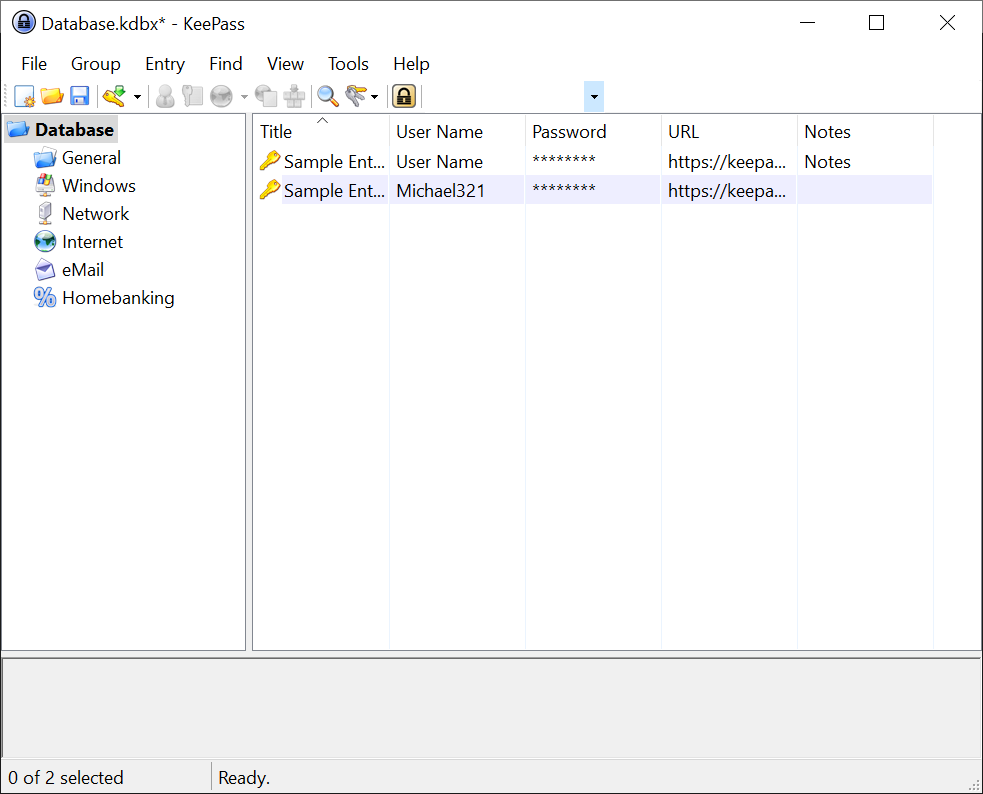
Once this procedure is over, KeePass shows the main window.
KeePass main window after creating a new database
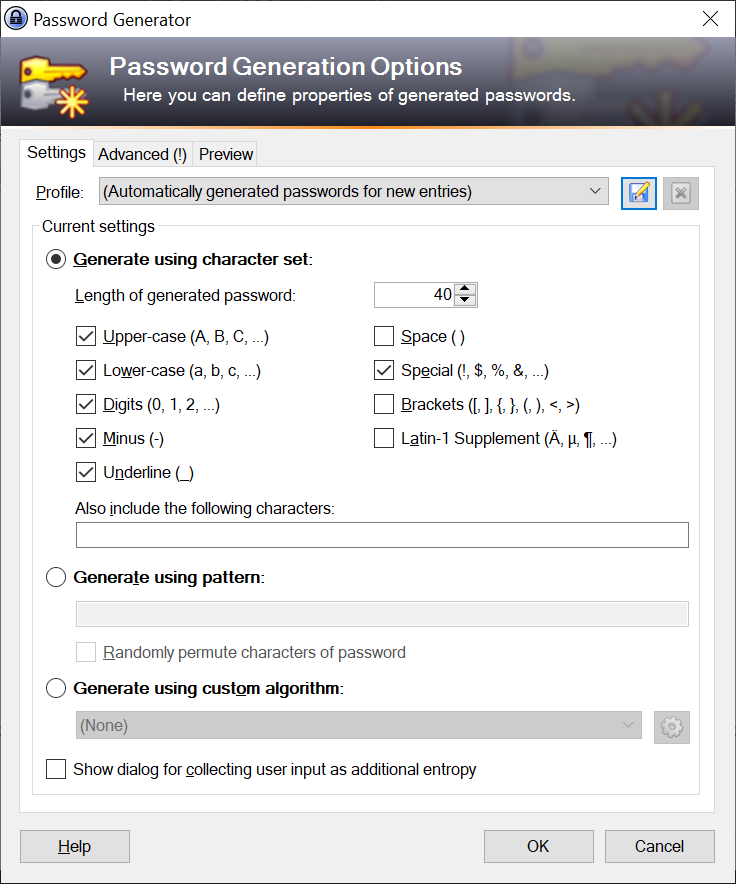
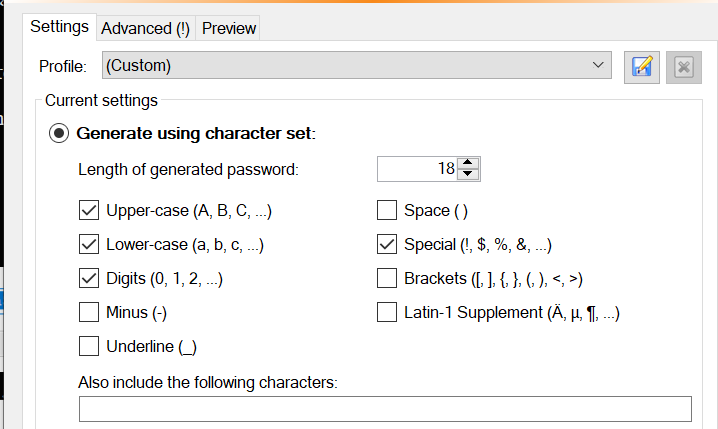
Before starting to create unique passwords all the online accounts, it’s important to create the template. Otherwise, the system will defer to defaults which may not include the standards you or your organisation may be aspiring to. In the tools menu, select Generate password. From here we’re going to establish the defaults for new passwords. First, increasing the length of generated passwords to 40 or more characters. (Length > complexity). Then increase complexity by including all alphanumerical characters, minus, underline & special characters. “Space”, Brackets & Latin-1 can also be picked, but be wary some services may have difficulty processing these characters. Additionally, if you are going to be using these to log in to other devices, these characters may not be available on the keyboard.
KeePass Password Generator window in the Settings tab. ‘Generate using chaarcter set:’ is selected with length of password at 40 characters. Alphanumerical characters are selected, along with ‘Minus’, ‘underline’, and ‘Special’.
Optionally, thinking of the situations where you may need to type out the password rather than copy-paste from the manager we move to the Advanced (!) tab and check ‘Exclude look-alike characters’.
KeePass Password generator window in the Advanced (!) tab, with ‘Exclude lookalike characters’ marked.
From here return to the settings tab and click the ‘save’ icon.
Save icon in the Generate Password tabSave as Profile prompt after clicking the ‘save’ icon. Profile name holds the (Automatically generated passwords for new entries) profile name.
In the save as profile you can click the arrow on the right, and select the ‘Automatically generated passwords’ so that KeePass will use this for all new entries. Alternatively, if you have multiple requirements, you can save repeat the previous steps and save the profiles according to your various needs. For most users, setting this as the default will provide sufficient security, and default complexity can always be increased in the future by following the same steps.
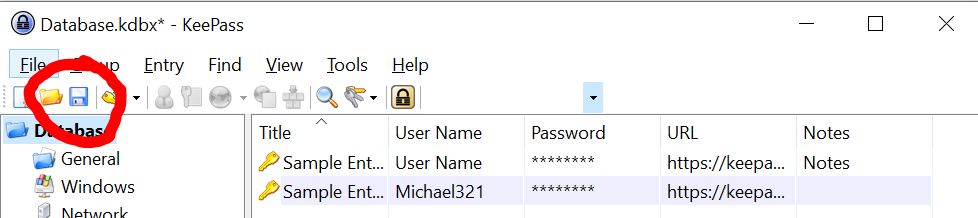
You’ll want to save your database and start creating your entries.
KeePass window with the save icon highlighted.
In order to create a new entry, click on the keys icon which opens the ‘New Entry’ window.
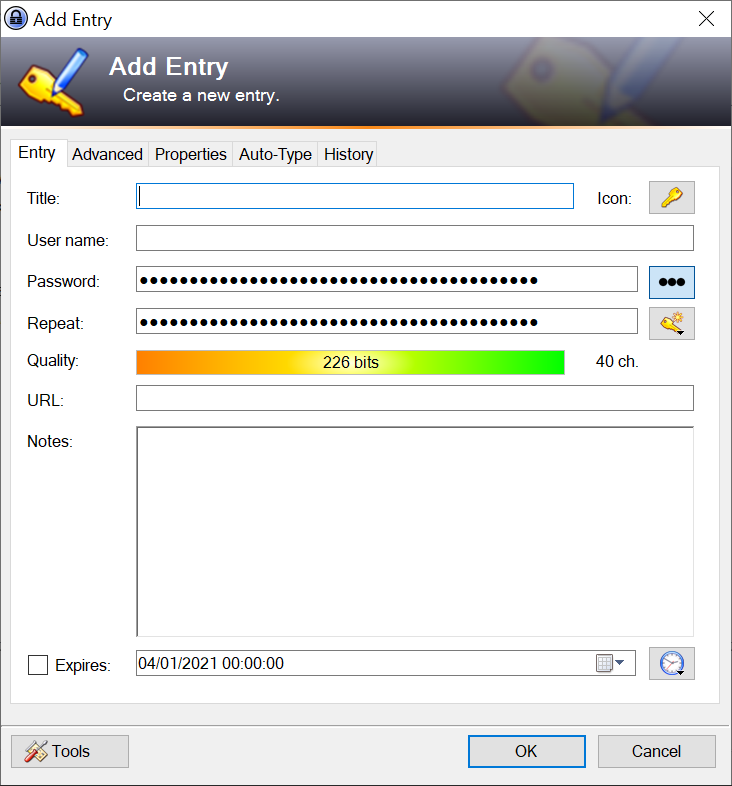
Keepass toolbar with the ‘New Entry’ icon highlightedKeePass Add Entry window
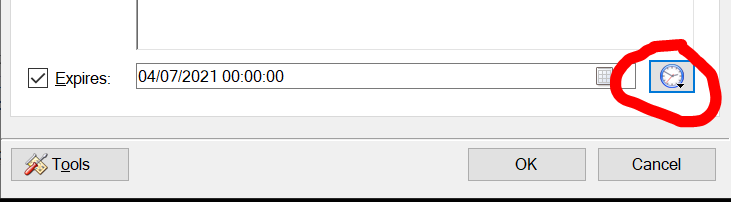
In the Add Entry Window, fill out the fields ‘Title’, ‘User name’, ‘URL’ with the relevant information. If there is additional information for the account this can be stored in the ‘Notes’ field. For example tools using SSO you can mention to ignore the password and rather which credentials need to be used. Additionally, in the Notes field you can mention which method of 2FA/MFA you are using for that entry. Finally, click on the clock at the bottom and select when you want the password to expire.
KeePass Add Entry window with the ‘clock’ icon highlighted
Selecting a time frame will then mark the password entry with a large X in the main window when you are looking to use it next. Default expiry times are 1 & 2 weeks, 1, 3 & 6 months as well as 1 year. My recommendation is 1 year for basic web services and 3-6 months for more sensitive items. This can also be used if you are testing out services, to delete your profile if you are not using the service rather than keeping an inactive account.
If the website / program complains your password is too long or uses characters it doesn’t accept you can change the password manually by clicking the 3 dots next to the password field which will make it legible as plaintext:
KeePass Add Entry window, with the 3 dots highlighted and the password shown in plaintext.
You can remove the problematic characters, and reduce the password length. If you have set an expiry date, it will be better to select the key icon, open the password generator and modify the defaults for the entry.
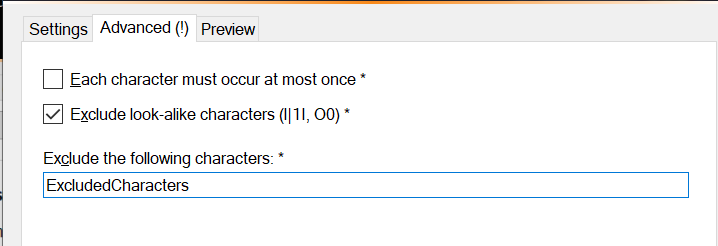
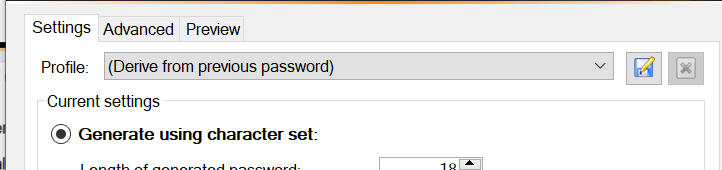
KeePass Password Generator window for a specific entry, Length reduced to 18KeePass Password Generator Advanced Tab showing the Exclude characters lineKeePass Password Generator showing ‘Derive from previous password’ as the password profile
Now, when you are updating the password for this entry, the password will be derived from the previous requirements.
Cloud Sync
The official installers work for Windows 7, 8, 10 or Server editions. For Linux distributions, KeePass is available in most default repos making it particularly easy to install and deploy. There are community ports to mobile devices such as Android, iOS, and MacOS. These can be found in the downloads page. As mentionned above, one of the advantages of KeePass, is being able to have multiple databases. If you need to provide support to family, they can share their database with you through a cloud storage service. Likewise, if you want to access certain accounts through your phone, you can do this with any number of cloud storage providers or even your own file server.
Things to keep in mind: 1. Sharing your database & master key with other people means they can access all of the accounts in the database. Segregate as needed (ISP credentials are not as sensitive as say, banking). 2. While the database is encrypted once locked, that does not mean people with access to your cloud storage can’t make a copy and brute force their way to your passwords. Select a strong master key and segregate which accounts you want to access from mobile device and which ones only from your PC: 3. If using a mobile port of KeePass, be mindful of how your cloud sotrage managed version control. You can quickly end up with a very different database on your phone than that which you are using on your computer.
Nice to know
You can store your password entries in the order you want. Keeping your entries organised according to what the services provide will help you find them faster. It is however not necessary, as KeePass offers a search bar which will show you all entries that match that description.
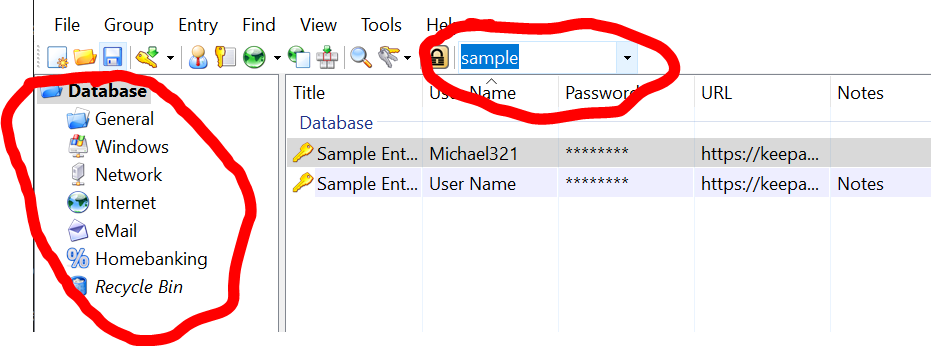
KeePass main window, with search bar & sorting pane highlighted
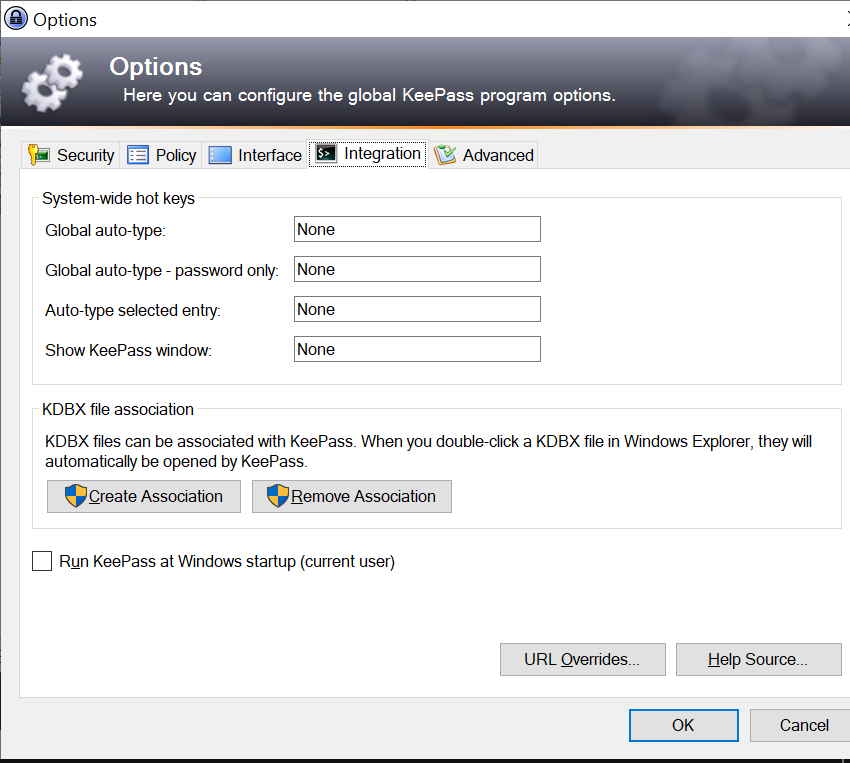
By default, KeePass will offer to autofill forms for you. I have had instances where hardware issues led to credentials beeing sent out on messaging applications. If this is an issue, it can be removed by opening the Options window (Tools->options) and selecting the integration tab. By changing all shortcuts to ‘None’ credentials are only stored in the clipboard when you actively select to copy them.
KeePass Options window with all System-wide hotkeys set to ‘None’.
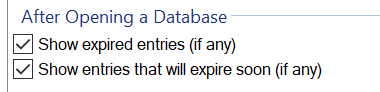
Finally, if you are setting expiry dates on your credentials, you can let KeePass show you which passwords have expired or will expire soon on startup. The entries appear as follows:
KeePass main window showing expired and soon to expire entries
To set this, in the Options window (Tools -> Options) select the Advanced tab. Scroll down to the “After Opening a Database” group and select both entries.
KeePass Options window, Advanced tab showing the ‘After opening a Database’ group with both options checked.